Angler Bi-Color Ring Light Kit with Light Stand (18")
Hey friends, long-time no blog! :)
I’m writing today because I had a need for an affordable ring light for use with my iPhone and I wanted to tell you what I thought about it.
In my world these days it’s becoming increasingly rare for me to need to use my DSLR, so like a lot of people I frequently use my phone camera for internal use only product shots and education videos. That said, for amazing as modern smartphones are for creating phenomenally good HDR images and pulling off amazing results in low light, sometimes you just need more light to get your desired results.
In my case, I found myself wanting something that would allow me to interact and record a tutorial video or review of something I was interacting with, but I still wanted to see my cell phone while I was doing it. I also wanted the light to be very good – you know, like pretty much every YouTuber these days!
When I started looking for options, the prices were more than I wanted and some of the purchases I made from Amazon were pretty bad. As a result, I reached out to my friends at B&H to leverage their expertise to find something that worked well but also didn’t break the bank.
My key criteria were:
- Affordable
- Diffused light
- Ability to control the temp
- Big enough to use for products as well as face lighting
- Ability to see my phone screen while recording, so this meant a phone mount as well as a pivot arm design.
- Easily portable for many use cases.
I’m happy to report that the Angler Bi-Color Ring Light Kit checked off all of the boxes and was almost perfect.
This shot was taken using JPEG only (doh) and mixed light (ambient light was tungsten with sources in front and behind the subject and edited heavily in Lightroom to make it suck less:

Kai with his dog Teddy using Canon 1DX II JPG and low brightness
Kai was struggling with the brightness, so I cranked it down low enough for him to tolerate it. If it wasn’t a quick and dirty shot (and a bit of luck with the dog), I probably would have taken a bit more time to make it much better. That said, that is what I like about this light – it allows me to do a lot better than my cell phone with very little effort. It makes experimentation much easier than traditional lighting methods thanks to the lightweight portable stand and battery powered light with adjustable temp and brightness!
A Closer Look
Here’s a closer look at the ring light itself:

Excellent diffusion panel on the front

Plenty of hot shoe mounting points for the camera adapter
Notice the inside and outside hot shoes all over things thing. It’s also shown with the batteries installed (included on some bundles), but it also includes the ability to just plug it into an outlet which saves weight.

Camera adapter could easily fit my iPhone 13 Pro with extra space left over
The camera adapter can be placed in any of the hot shoe mounts, but I elected to put it in the 6 O’clock spot. One side is spring loaded, so it supports many phones. My unit had a pretty strong spring, so I could only get it to open to just under 3 inches in width.

The hot shoe phone adapter could easily be moved to where I needed it
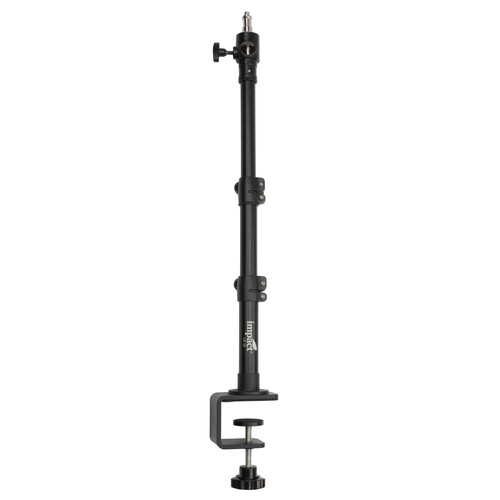
 I used a Impact C-Stand along with a grip head and extension arm
for added flexibility and reach for this scenario

With this setup, I could peek through and interact with the lens
on the table while monitoring the video
Notice how the captured content has drifted off the table!
Remember, my goal here was to test the ability to record where I was both interacting with and viewing the video of with an object on a table using my iPhone. I hate video editing, so I’ll spare you that boredom and just show a shot that I did with the iPhone 13 Pro and enhanced with Topaz AI:

iPhone 13 Pro static image taken using the ring light configured as shown previously
As a lighting tool, it did great. Where it failed miserably (as you can see if you look carefully in the prior image is that the ring light would drift and often overshoot the table. This seems to be due to the lack of any sort of teeth or serrations on the adjustment knob, so I really grew frustrated at this problem. While it might be fixed by adding a rubber washer or something, know that going in won’t “just work” for this scenario, It’s fine when upright vs this extreme angle with the weight of the camera on it, so if your goal is to do a podcast or more practical angles, then it will be great.
Testing in Complete Darkness
I wanted to test with a real camera in a normal scenario where the camera isn’t hanging from the hot shoe. For that scenario, it did great.
Light makes up for the lack of shutter speed, so I decided to push things to the limit, and this time using RAW, to see what I could do. Here were my light settings:

61% brightness in total darkness at 5400k
Even though the room was lit (by the ring light) for the shot, it was done at night with no ambient light beyond the Christmas tree for this shot.
For fun, I decided to use the Passport ColorChecker to make sure the foreground color was as accurate as I could get it, but for those who are new to the complexities of lighting – that only impacts the subject (Kai) and has zero impact on the ambient light on the background.

Canon 1DX Mark II f/2.8 @ 70mm for 1/10 sec at ISO 100 from RAW
Here’s a behind the scenes look but I didn’t make any effort to get accurate colors or light for this shot:

The camera was on its own tripod for this series and just shooting through
Conclusion
For the price of about 1 to 2 tanks of gas these days (at the time this was written), I think this ring light offers a lot of bang for the buck. Its ease of use, portability and overall quality of light were way more than I was expecting.
Will it keep up with my studio lighting? No, but it’s great for on the go video that is all to common these days with social media influencers who need professional looking light when on the camera as well as when interacting with products.
The Impact Air-Cushioned Light Stand (Black, 8') included in this review was perfect for cost effective portability, but I wouldn’t recommend it for the product review scenario I mentioned. For that, you’ll definitely want to invest in a C-Stand or even better, a base with wheels along with a grip head and extension arm. While you are at it, don’t forget a saddle bag (bring your own sand).
Where to Buy?
CLICK HERE to learn more or buy today. Don’t forget that you can apply for the Payboo card and get special financing to make it easier to purchase in these difficult times.
Enjoy more classic reviews on the Reviews tab.
Disclosure
If you make a purchase using links found in this article, I may make a commission. It doesn’t cost you a penny more, but it does help to support future articles like this.